[ Photography ] Peak Design Capture Clip V3 Review
Today I’m taking a look at an alternative (or addition) to camera straps and slings. For nearly a decade, I used an ECHO NiNER camera strap with my Nikon and it worked out pretty well. While it wasn’t the most adjustable or smooth strap, it was certainly well made, with thick nylon webbing, solid quick-release buckles, and silicone non-slip coating. I worried that maybe somehow the buckles would accidently undo themselves, but I never had an actual issue.
I generally became tired with traditional straps because I wasn’t fully satisfied with the feel of a camera on my neck and the thick bulk of the E9 really could be improved. (Do I really need mil-spec webbing on a camera?) The idea of using a “holster” sounded pretty good. The most popular type at that time was the Spider Holster which necessitated a ball mount be affixed at the bipod mount. The biggest issues with that are it is no longer quickly mountable to any tripod and the camera no longer sits flat on any table. And the holster itself is pretty bulky. Not worth the hassle, frankly.
Peak Design introduced their Capture Clip several years ago as an alternative and it was pretty revolutionary, in my opinion. It was much smaller, flat, and compatible with Arca-Swiss tripod mounts. The “holster” clip itself was small, slick, and could be mounted on a variety of places, including backpack shoulder straps, making it extremely convenient and the camera still within easy access. Moreover, a friend of mine recommended me the PD clip since he used it with his own DSLR while hiking, keeping the camera hands-free when doing the Pacific Crest Trail through-hike. (Speaking of which, if youre into hiking, please head over to his site Halfway Anywhere to check it out. He’s crazy avid and runs a great site.)
Having picked up two camera bodies recently, I knew being able to switch between them halfway easily would be great, not to mention I wanted to try a different way to hold my camera while exploring. The typical over-the-neck carry wouldn’t work with two bodies and no way was I going to use those dual camera vests. So the idea of the capture clip really fit that need.
I’ll admit, I picked up a cheap, fake PD clip copy several years ago. First of all, at around $10 USD, the price was right. I needed to know how well it works and even if I would find use for it before investing in a real PD clip. And honestly, with one camera body and the camera strap. I had little use for a capture clip. So it basically sat in my closet for 2 years or so. For good reason, it turns out. But I’m getting ahead of myself, let’s start with a look at the real deal.
Peak Design Capture Clip V3 Review
This PD Capture Clip is the third iteration and has been fairly significantly redesigned to be smaller and sleeker than the two previous versions and it also comes in black and this shiny satin silver. The mounting plate is also thinner than before, but is still fully Arca-Swiss compatible. The clip can be mounted on a wide variety of straps and belts, as long as they are under 2.5” wide and .88” thick. In my case, I mounted it mid-way on the left shoulder strap of my Adidas backpack.
The mounting plate is screwed to the ⅜” tripod mounting thread on the bottom of a camera or in my case, to one of the threads on the cage. Sliding the plate into the clip will automatically result in an audible “click” and the plate is locked into the clip. (The plate can only be slid into the clip one-way and removed as such.) This results in a very secure holstering solution for your camera and PD claims that it has a 200-lb holding force, far more than virtually any camera setup and is probably much stronger than the fabric you’re mounting it to.
To remove the plate from the clip, simply push in the button on the side and simultaneously slide the plate (and attached camera, of course) out. With a bit of use, I was able to easily push the release button and pull the camera off the clip with one hand. Of course, I would advise this only with at least a hand strap or shoulder strap attached… you know, just in case you’re not as dexterous as you think you are. For extra security, the redesigned plate also resulted in the one toggle switch on the side of the clip serving as a safety lock function. Rotating the toggle switch 90° results in a safety lock that prevents the button from being depressed and therefore keeps the plate locked in place. It needs to be rotated back before the button can be pushed in.
The size and convenience of a smaller “holster” other than the Spider holster is obvious, but why does the clip work better than any traditional carry strap or sling? It allows for hands-free carrying of the camera when not in use for longer periods of time, especially when more strenuously walking / hiking about. With a traditional over-the-neck strap, the camera bounces around against the body without a hand to stabilize it. When carried over-the-shoulder, the strap can slide off the shoulder, again, without a hand to hold it. Carrying the camera crossbody works well, but it doesn’t work comfortably with a backpack or shoulder bag, resulting in straps crossing other straps; a messy ordeal if you ever need to take one and not the other off. In addition, being mounted on a backpack (or other shoulder strap) results in better weight distribution since such straps often are thicker and offer more padding than most camera straps.
While the PD clip certainly sounds absolutely awesome, I do have a complaint, but it could be easily remedied by PD. It relates to the two mounting thumb / sunken head screws. First off, why do the thumb screws lack a coin/flathead slot to help tighten it down? It seems like an oversight considering those two screws hold potentially thousands of dollars of equipment and that some people may lack the necessary strength to really get it tight, even if they have to make the head just a few millimeters thicker for more material. Secondly, why are only two sets of same-length screws included? Does it really cost that much more to include a second, slightly shorter set? My backpack’s shoulder strap is actually fairly thin, so when the thumb screw is fully tightened, there is about 3mm of threading poking out the back of the clip, potentially cutting into my clothing.
Yes, I could take a dremel to it or buy a second set of screws (which I will), but this seems like a huge oversight and I’ve sent an e-mail over to PD. I’ll update if I hear any feedback from them regarding this. (Update 3/19: they “are considering” the coin-slotted screws and they do not offer any shorter-threaded screws. Too bad, but not a break-it for this product.)
Viltrox (Copy) Review and Comparison
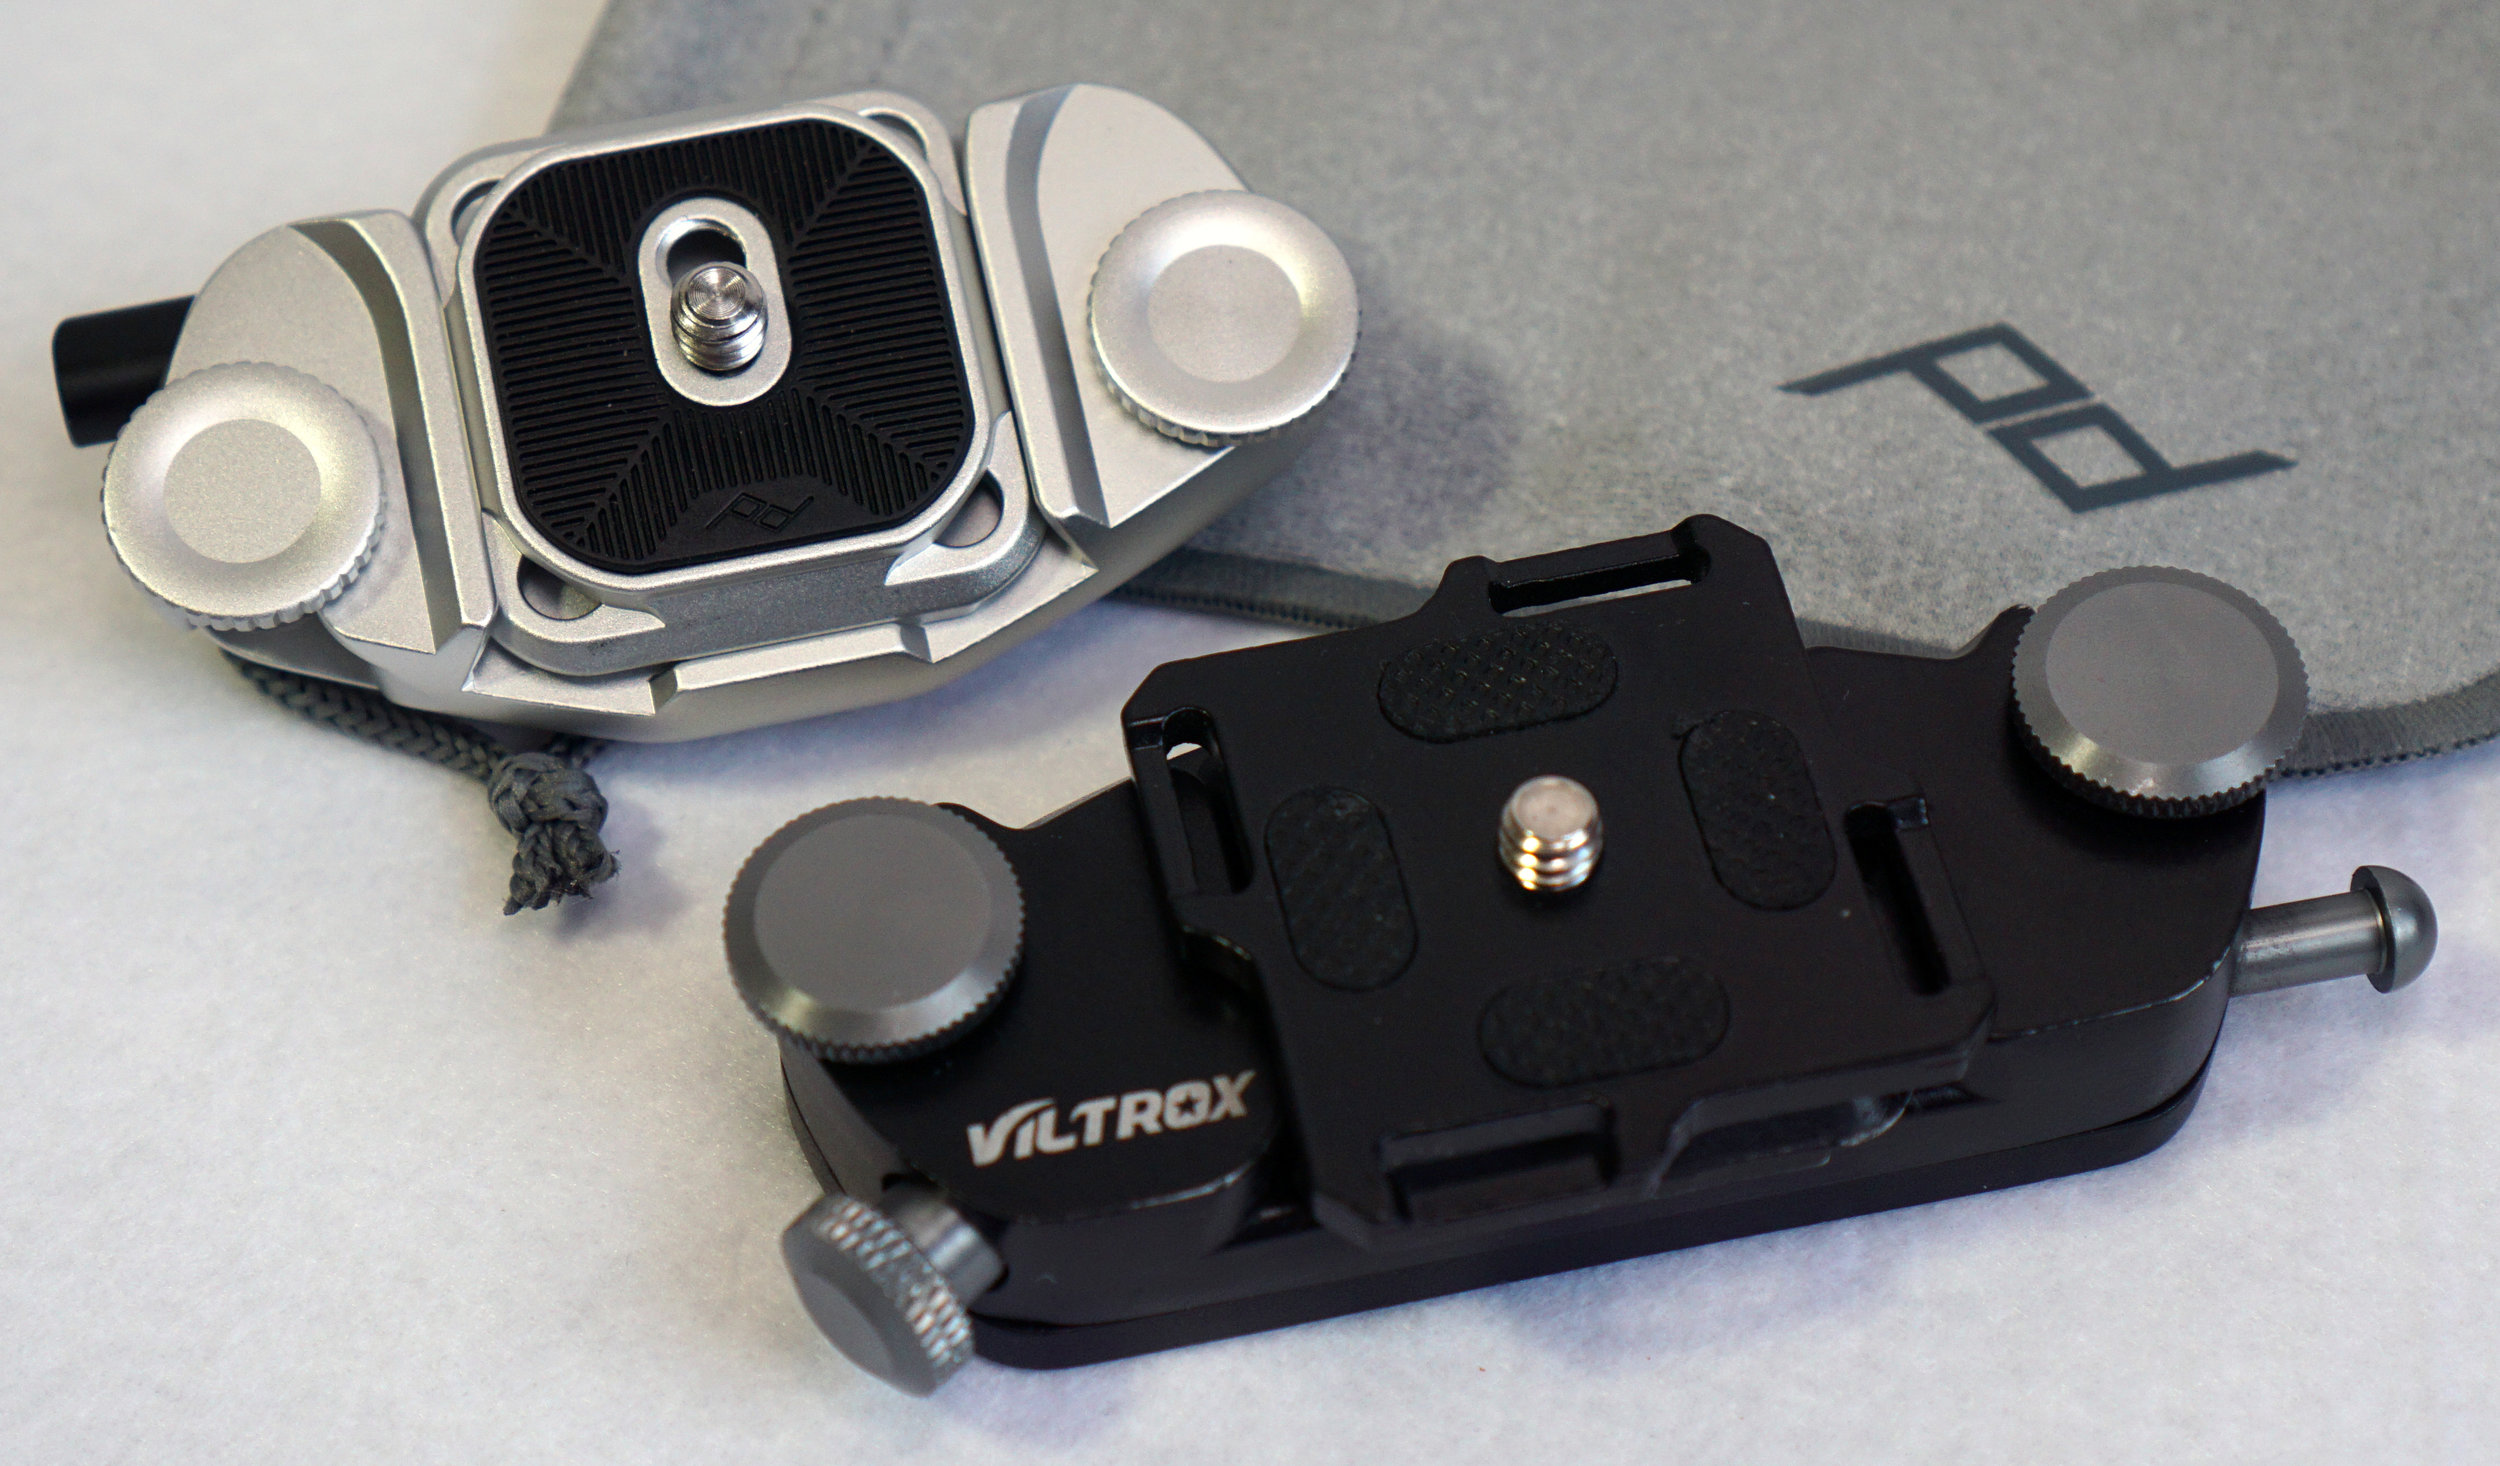
This Viltrox-branded Capture Clip is a clone of the original PD V1 design, so there are a few differences when we compare the V1 to the current V3. The most apparent is the footprint size. The V1 is much larger and wider. The larger size is nowhere more noticeable than when mounted to a backpack shoulder strap, as the width is definitely felt. My arms definitely hit the side of the clip quite frequently and that might be the main reason I never decided to use this clip in that intended position.
There is also a side tension screw which tightens the slack between the clip and the camera mounting plate. Tightened all the way, the screw acts as a lock, preventing the removal of the camera.
The button to remove the camera plate is also quite long, which I suppose is good for larger DSLR cameras. The metal button definitely has a more positive feel compared to the smaller V3 button, so in some instances, I like this better.
The V3 and V1 plates are both fully compatible for the V3 Capture Clip, but unfortunately, the V3 plate does not work with the V1 knock off clip, due to the shallower mounting plate, resulting in the camera body contacting the thumb screws. This is a small price to pay considering the smaller footprint.
The finish on both clips really can’t be compared. The PD clip has a wonderful anodized aluminum finish whereas the V1 clip has a somewhat uneven coating and the metals are quite heavy, porous, and somewhat poorly casted. To be fair, this piece of copied chunk of pot-metal is only about $10 USD, shipped. I’m not sure I can really complain a whole lot besides the fact it’s a copy. Luckily, to my knowledge, there are no knock off V3s of the capture clip yet. Maybe those Chinese companies aren’t willing to retool for the newer version.
Testing
Of course, testing something like this is purely subjective, as it highly depends on your needs and gear setup, but I’ll tell you what I thought after about a solid week’s worth of use walking and hiking around for the whole day in winter weather.
I currently have the V3 Capture Clip mounted on an Adidas 26L OPS backpack, a decent “box” type backpack so trendy now in Japan. While the padding on the shoulder straps are not particularly thick or heavily padded, they are adequate even when the backpack is fully loaded with two cameras, a sweater, a 14” laptop, and associated peripherals. This made it a perfect specimen to mount the clip, as I could see how comfortable it would be with weight directly on my left shoulder strap.
I found that while I could theoretically have two camera bodies walking around, it still was a bit of a hassle having to switch off between them, as I needed to make sure I wouldn’t drop one while drawing or holstering the other. Since I didn’t change bodies often, I more often than not just ended up leaving one camera in my backpack.
Did that make the Capture Clip a moot purchase? Nope! I still found plenty of use for it for the hands-free purpose, locking the camera into the clip when I didn’t need it when strolling around. It proved especially useful hiking up a somewhat icy treacherous mountainside path to take some of these gorgeous views.


