[ Alto Works ] Front Bumper Modification, Part 2
Now that I have some parts in and the front grille properly painted, we can continue our front bumper modifications on my Alto project. I actually performed this modification some months ago, but never wrote about it previously. Since I did a few other things along with it, I thought I’d discuss a bit.
My priority was to increase airflow toward the intake, an important aspect of turbo cars. As you might see here, it is hidden behind the right headlight, deep in the engine bay with no direct airflow, sucking in hot air from near the engine. Now that I have the hood vents in, air pressure under the hood won’t be an issue if I pipe in extra air from the front grille. The question is where on the bumper?
So I considered my various options for a long while, at first considering the use of the far right side vent, but the logistics of drawing air from there would’ve proved a bit complicated due to the headlight mounting bracket, the limited open space, and the oil cooler.
I settled on a 50mm aluminum duct piping and an aluminum funnel in the only open space on the front bumper, the little corner between the existing grille, headlight, and turn signal lamp.
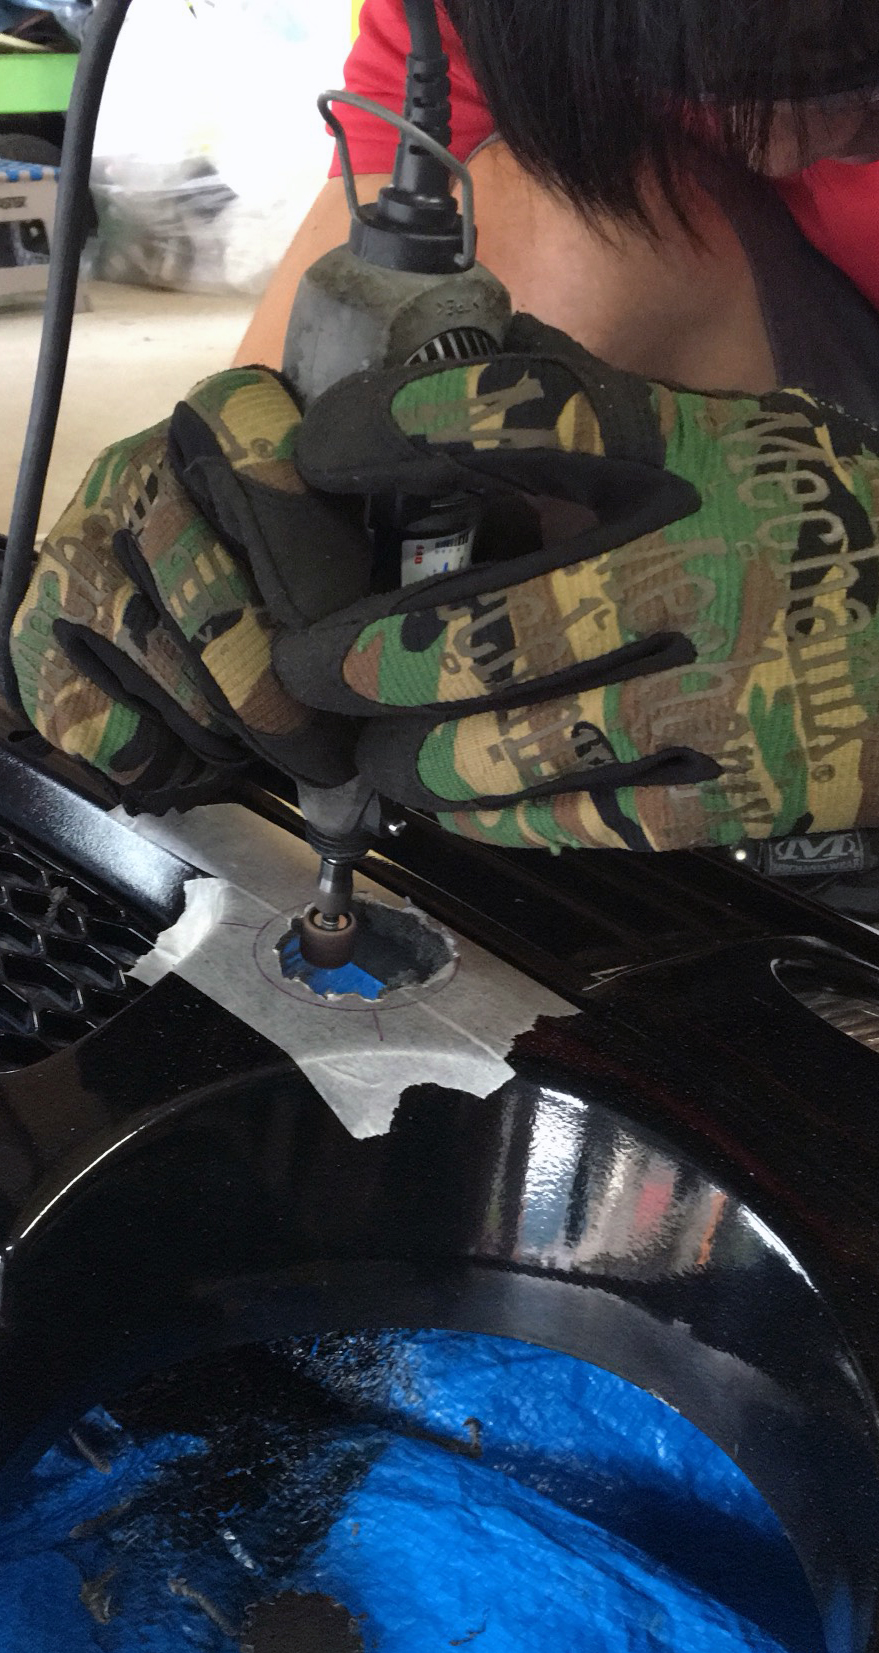
At first, I mocked up the piping several times with masking tape and removed and refitted the bumper several times to make sure it all lined up. Of course, I have to cut the bumper to get the aluminum funnel in. It took quite a bit of cutting and sanding to get it in, but I wanted it sized just right so that it can be held in place somewhat tightly.
I wanted to use some metal brackets, but the space behind was pretty tight, so I had to resort to using epoxy putty. My application skills are a mess, so unfortunately, it didn’t come out as cleanly as I wanted to. No matter; it was the back of the bumper afterall. Basically, the whole assembly is snugly fit, the outlet of the duct pushing up against the intake piping.
With the bumper back on, I took the car out for a test drive. As expected, I couldn’t tell much of a difference in performance or sound and noise levels, but in theory, this should increase airflow and pressure into the intake. Weather should still be kept out as the piping goes up and the opposite-facing HKS filter should prevent any waterlogging. However, due to the small diameter piping and the indirect flow of air, the ram air effect and overall improvement may be limited. This modification will likely only benefit the car to a very small degree on the hottest of days and the hardest of driving.
The next minor change I made to the front of the bumper is to clean up the front by adding a bit of mesh to the center grill for a more finished and professional look.
Along with that, I installed an aluminum GoPro mount directly to the bumper for stable video. My previous videos I took<l> were not secure enough because I had them on a longer arm mount which vibrated as you can see.
Here’s a quick one with the new mount, unstabilized in post. It is much more secure though I might have to reconsider in the future to mount on a stiffer point like the hood or brace the camera in additional ways. (The windshield, while very secure, is way too high and makes for a really boring video.)
For the last minor addition, I added some QR fasteners to the sides.
These are basically two aluminum mounts with a thick rubber band securing the two. It is designed so that the bumper can be quickly removed in a race setting for maintenance. Here, I’m using them to help secure the bumper since the upper radiator support mounts have a bit of play in them. And for those racing looks, of course!
You may notice one more change to the bumper here in the above shot, look forward to more about it next time!


