[ Alto Works ] Oil Cooler Project, Part 4
This is now Day 5 (or so) of my oil cooler and gauge install and I’m hoping this will be the last day! I’m eager to get the oil cooler properly working. Today’s challenge will be getting the aforementioned oil relocation plate installed and oil flowing between all the components. This means I have to get the oil filter off, which is really inset into the engine bay behind the AC radiator, as I mentioned previously. Terrible location, seriously.
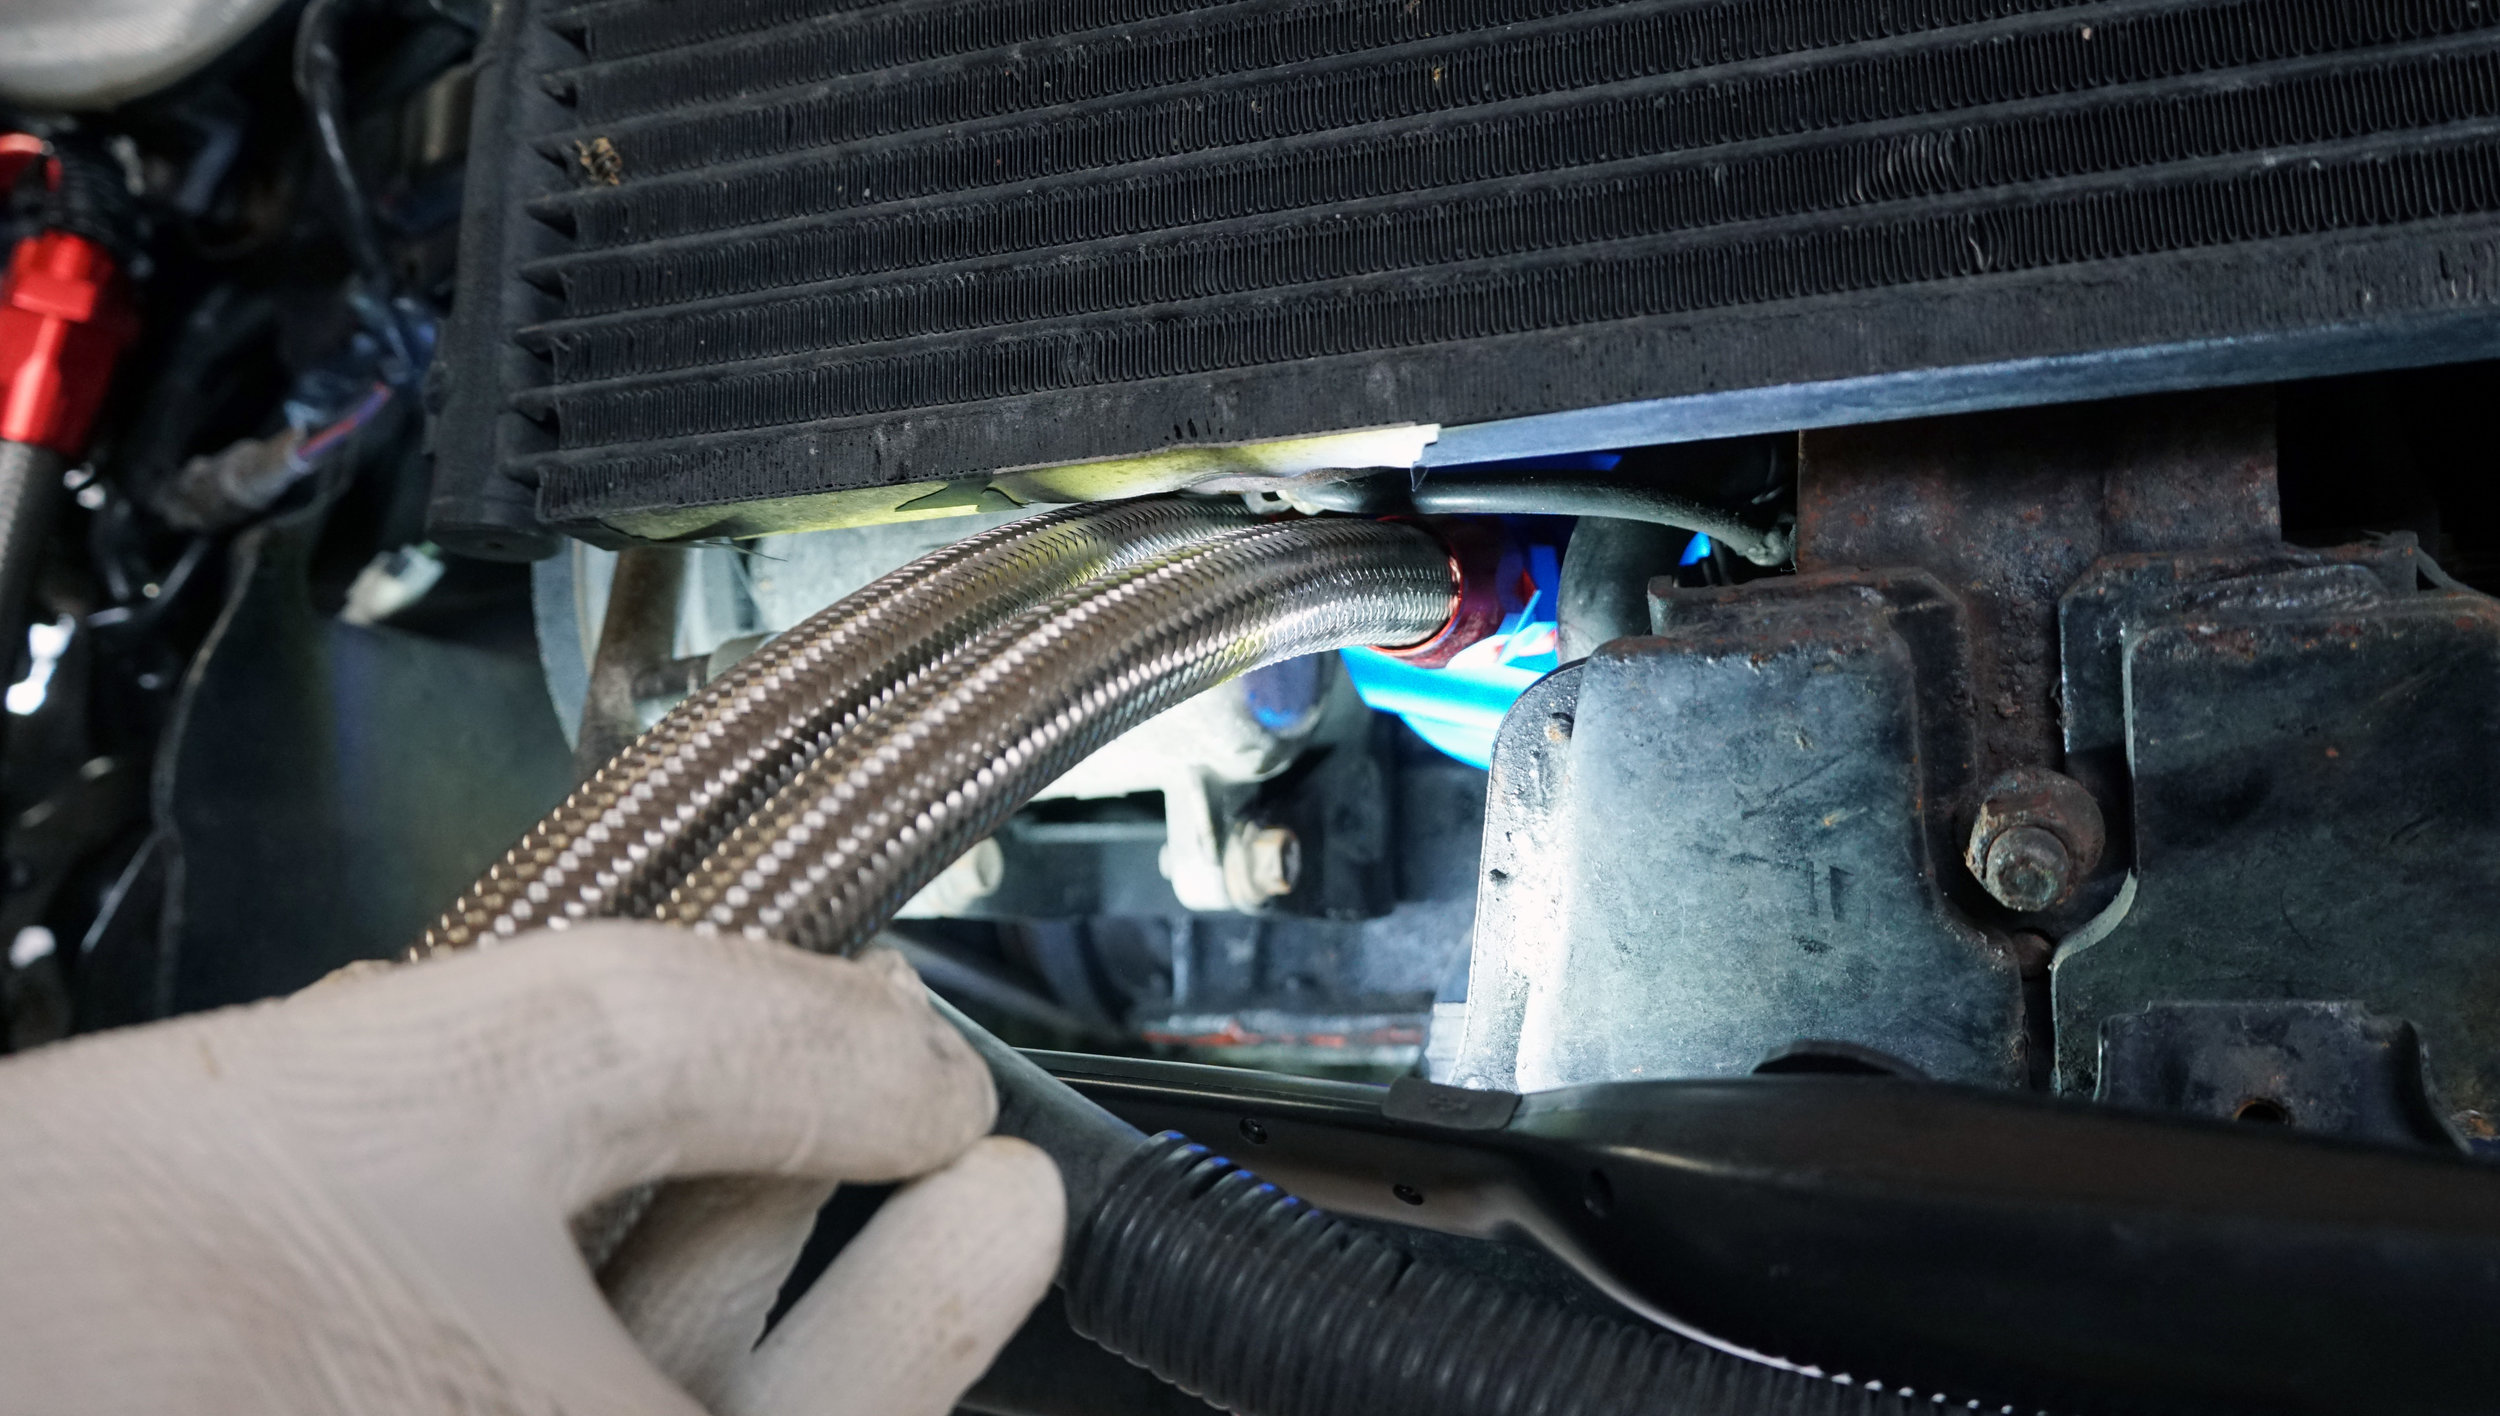
We actually had to unmount the AC radiator and with a lot of finagling, cursing, and sweat, the oil filter finally came off. The adapter did not want to install easily, either. For the thick AN10 hoses to fit, we actually had to cut 5mm off the front crash beam to give us a bit of clearance. Even then, it was an extremely tight fit. Properly tightening it was also tough, since there was little room to reach in, even with my friend’s huge variety of tools.
With a final tap, we figured it would be enough. Let’s pray this won’t leak.
Remember when I said not to trust cheap Chinese products? <l> Well, yet again we ran into another issue. Similar to my ⅜ -16 threading issue, the oil radiator itself had poorly cut threads, preventing me from attaching the AN10 hose smoothly. So close, yet so far. With additional filing work, we were finally able to thread it on, barely. We had to be extremely careful since both the radiator and hose connectors were made of aluminum. We couldn’t just “man-handle” them and crank them on, as too much pressure and either or both could be irreparably damaged.
My Alto usually takes about 3 liters of oil in its tiny engine, but with the additional capacity of the car, as the oil cooler itself will now occupy a bit of oil, he estimated 4 would be good. We first put in 3 and cranked on the engine, checking thoroughly for leaks. Matsuda-san felt confident after a few minutes, then he topped off and added the additional 1 liter of oil. Circulating it through, we let the car idle for a bit, checking for leaks. So far, so good. After a few minutes with everything warmed up, we rotated the throttle cable and idled at high RPM for awhile longer. Everything seems fine so far… no leaks or issues that we could see.
But before I button up the front end back up, the hoses are obviously a bit of a mess right now. With some wire loom protectors and cable ties, I fixed all the loose and dangling hoses, hopefully preventing excessive movement and protecting them from debris, rubbing on the chassis, and each other.
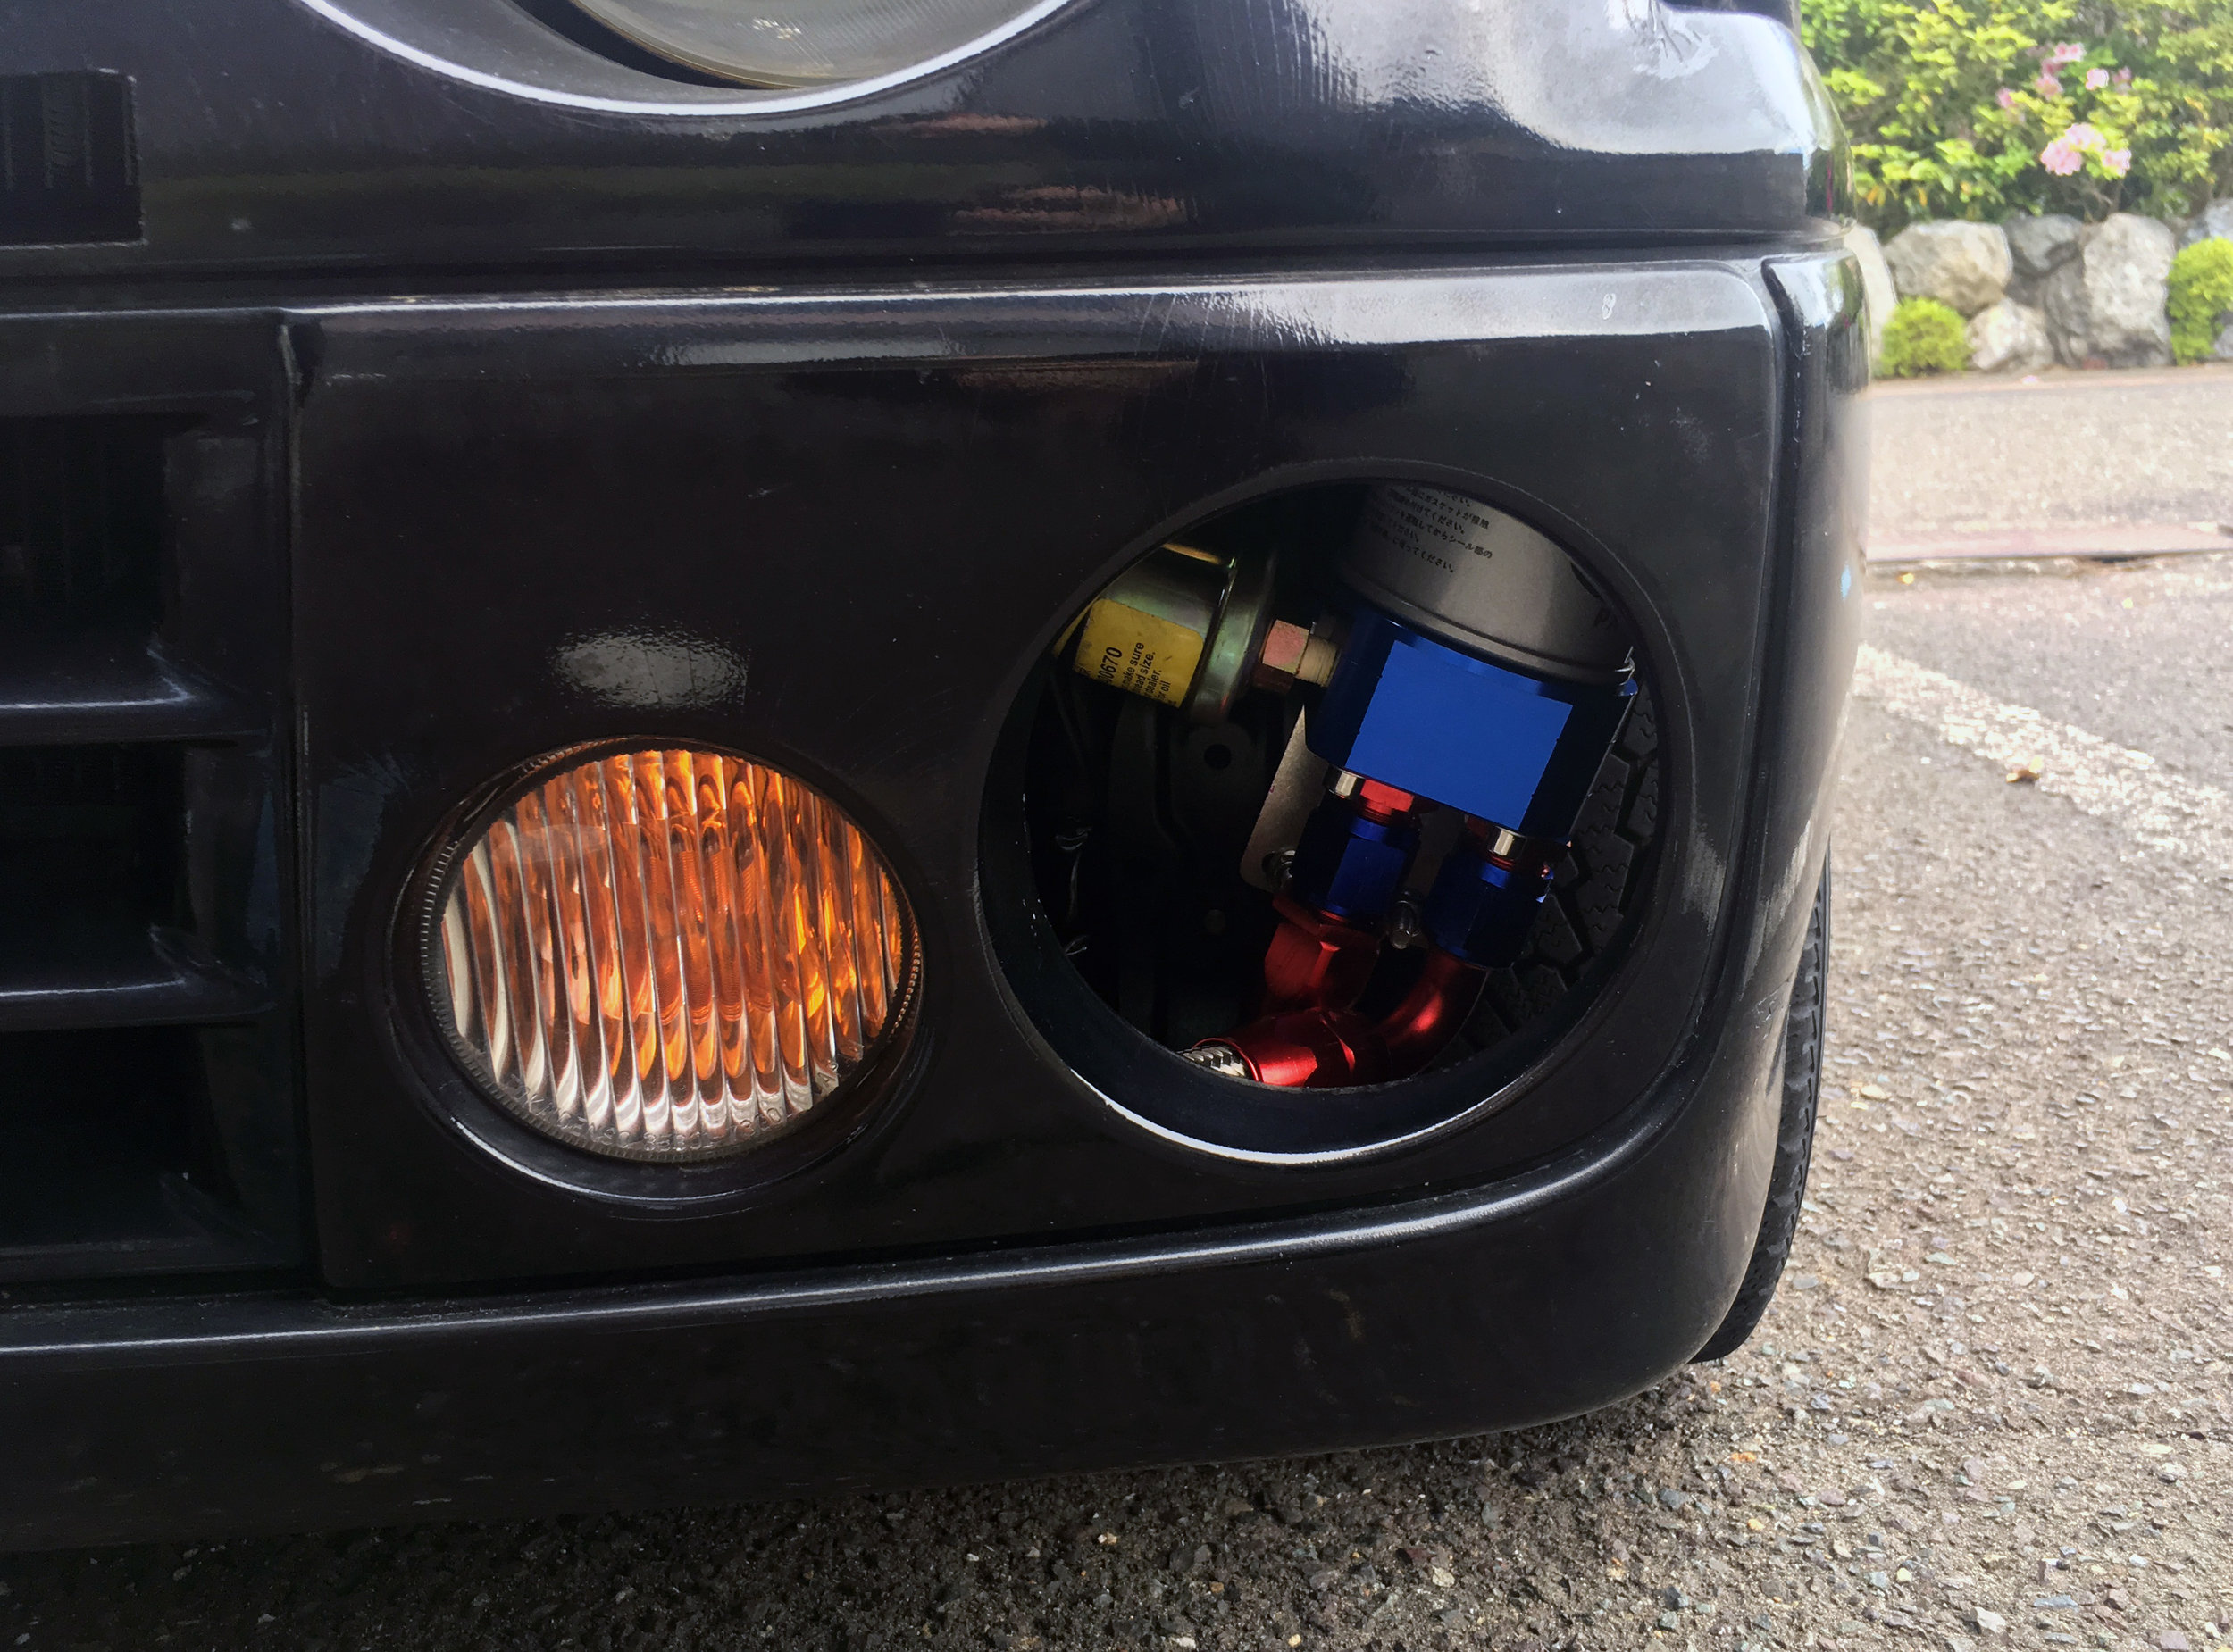
The left side has now a gaping hole where the fog light was. While I could just drop in a mesh to match the right, I don’t think that’s what I want to do. With the whole oil cooler radiator setup, I’m doubtful extra cooling needs to be done for the left side so there is no reason to expose the remote adapter.. Not to mention any rocks or debris could potentially damage the rather fragile oil filter and oil pressure gauge.
This leaves me with plenty of potential options, but this will be a temporary placeholder: A simple sheet of polypropylene and carbon fiber vinyl. While this doesn’t look bad, I miss having the additional lighting from my fog lamps. This is how I rolled for a few weeks until my other parts came in…
But before I drove off that evening, he warned me to check frequently for leaks and lowered engine oil pressure. While I’m happy to leave it as it is now, running right. But there are some minor issues I’d like to address. The final post on this project next time!


