Ready Seat Belt

レディー・シート・ベルト

A look into the cool and bizarre, focusing on the Japanese import car culture and delicious ramen. Updated weekly.

  • Home
  • Blog
  • Food
  • Archive
    • Complete Archive
    • Ramen Archive & Map
    • Suzuki Alto Works HA11S
    • Suzuki Alto Works HA12S (Scrapped)
    • Suzuki Swift Sport ZC31S (Sold)
    • Suzuki Wagon R MC22 (Scrapped)
    • Newbie Guide
    • Photography
  • About
  • Facebook
  • Instagram
  • Twitter
2018-04-22 006.JPG

[ Alto Works ] Rear Bumper Cut (Dat Butt)

July 02, 2018 by William Tjipto in Cars, Japan, Ownership, Project Sachiel

With the front bumper getting all the attention, I had to show a little love to the rear of the Alto as well. I can never leave well enough alone, as there is always something that can be done in the name of improvement… or at the very least, custom looks. (Warning, lots of rear-end shots ahead.)

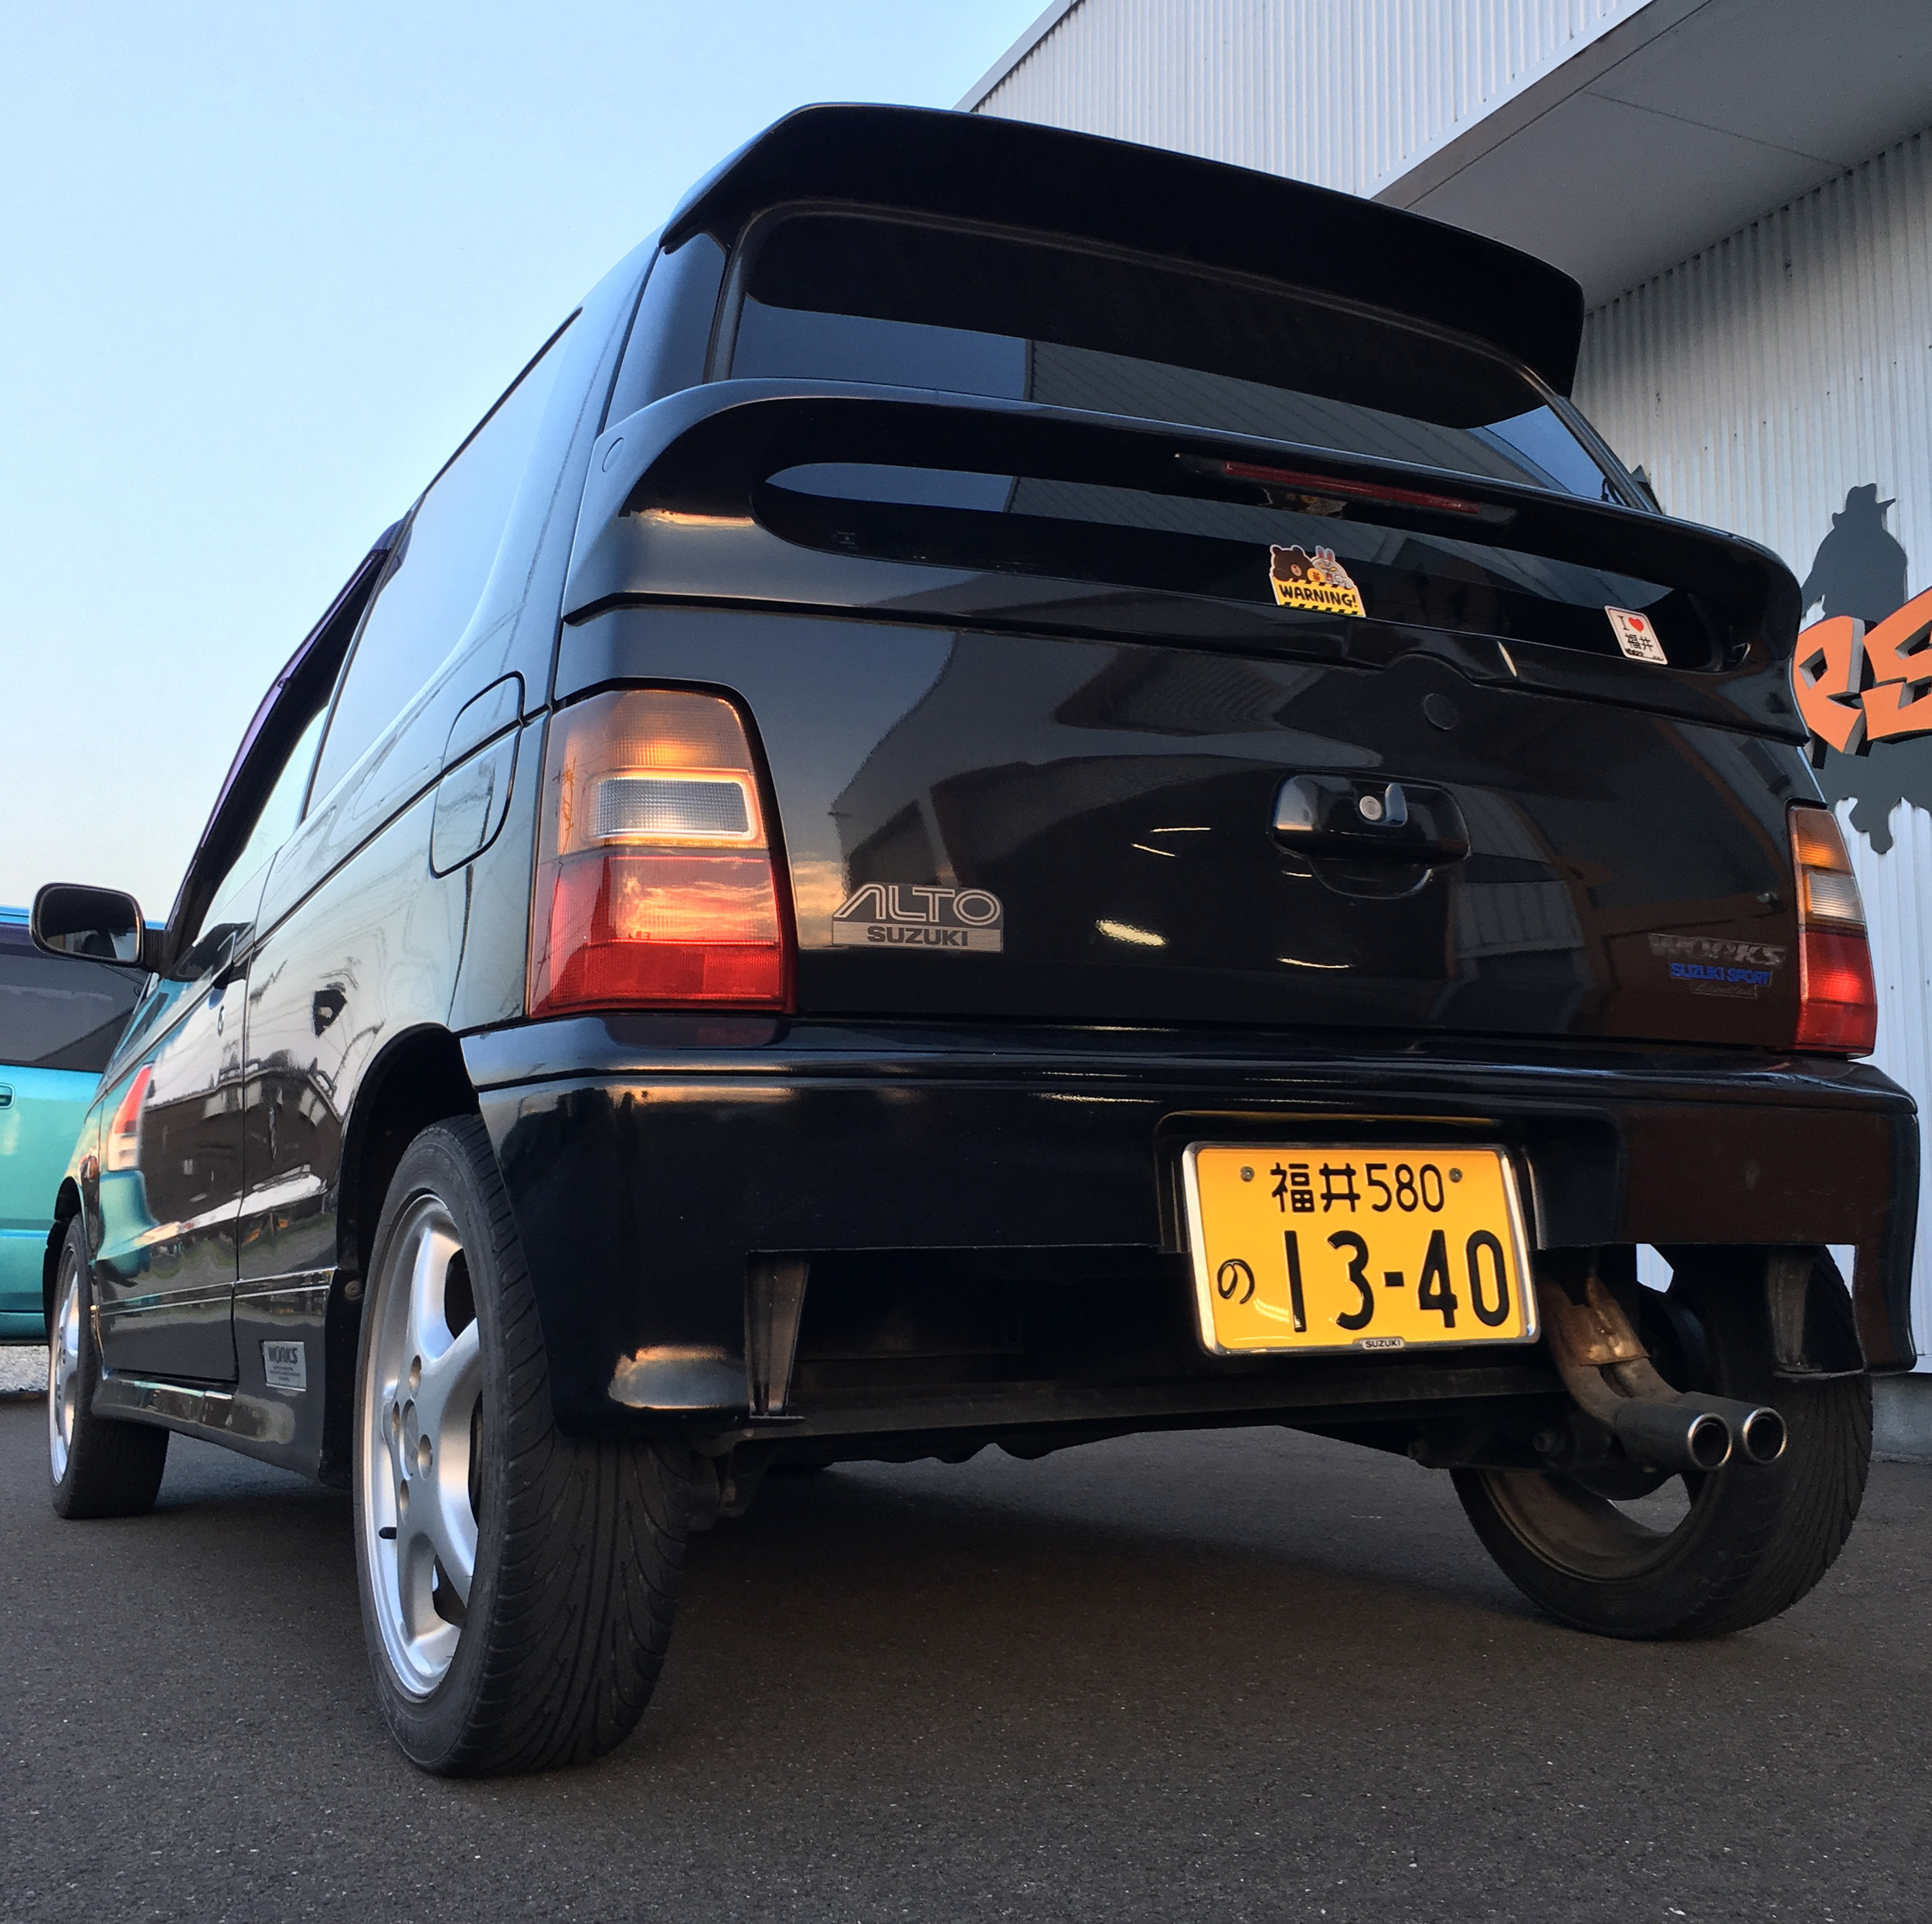
Here, the improvement is more than simply a need to look cool. As previously mentioned, the rear bumper has two slots to evacuate underbody air pressure and to prevent “parachuting.” Essentially, this means air passing under the car can get trapped in little pockets toward the rear, creating a higher pressure zone and adding drag. However, it isn’t executed perfectly on this Alto. Looking at the rear bumper, I can still see huge flatspot areas where air can get caught and raise pressures.

IMG_2754.JPG
DSC_5676.JPG

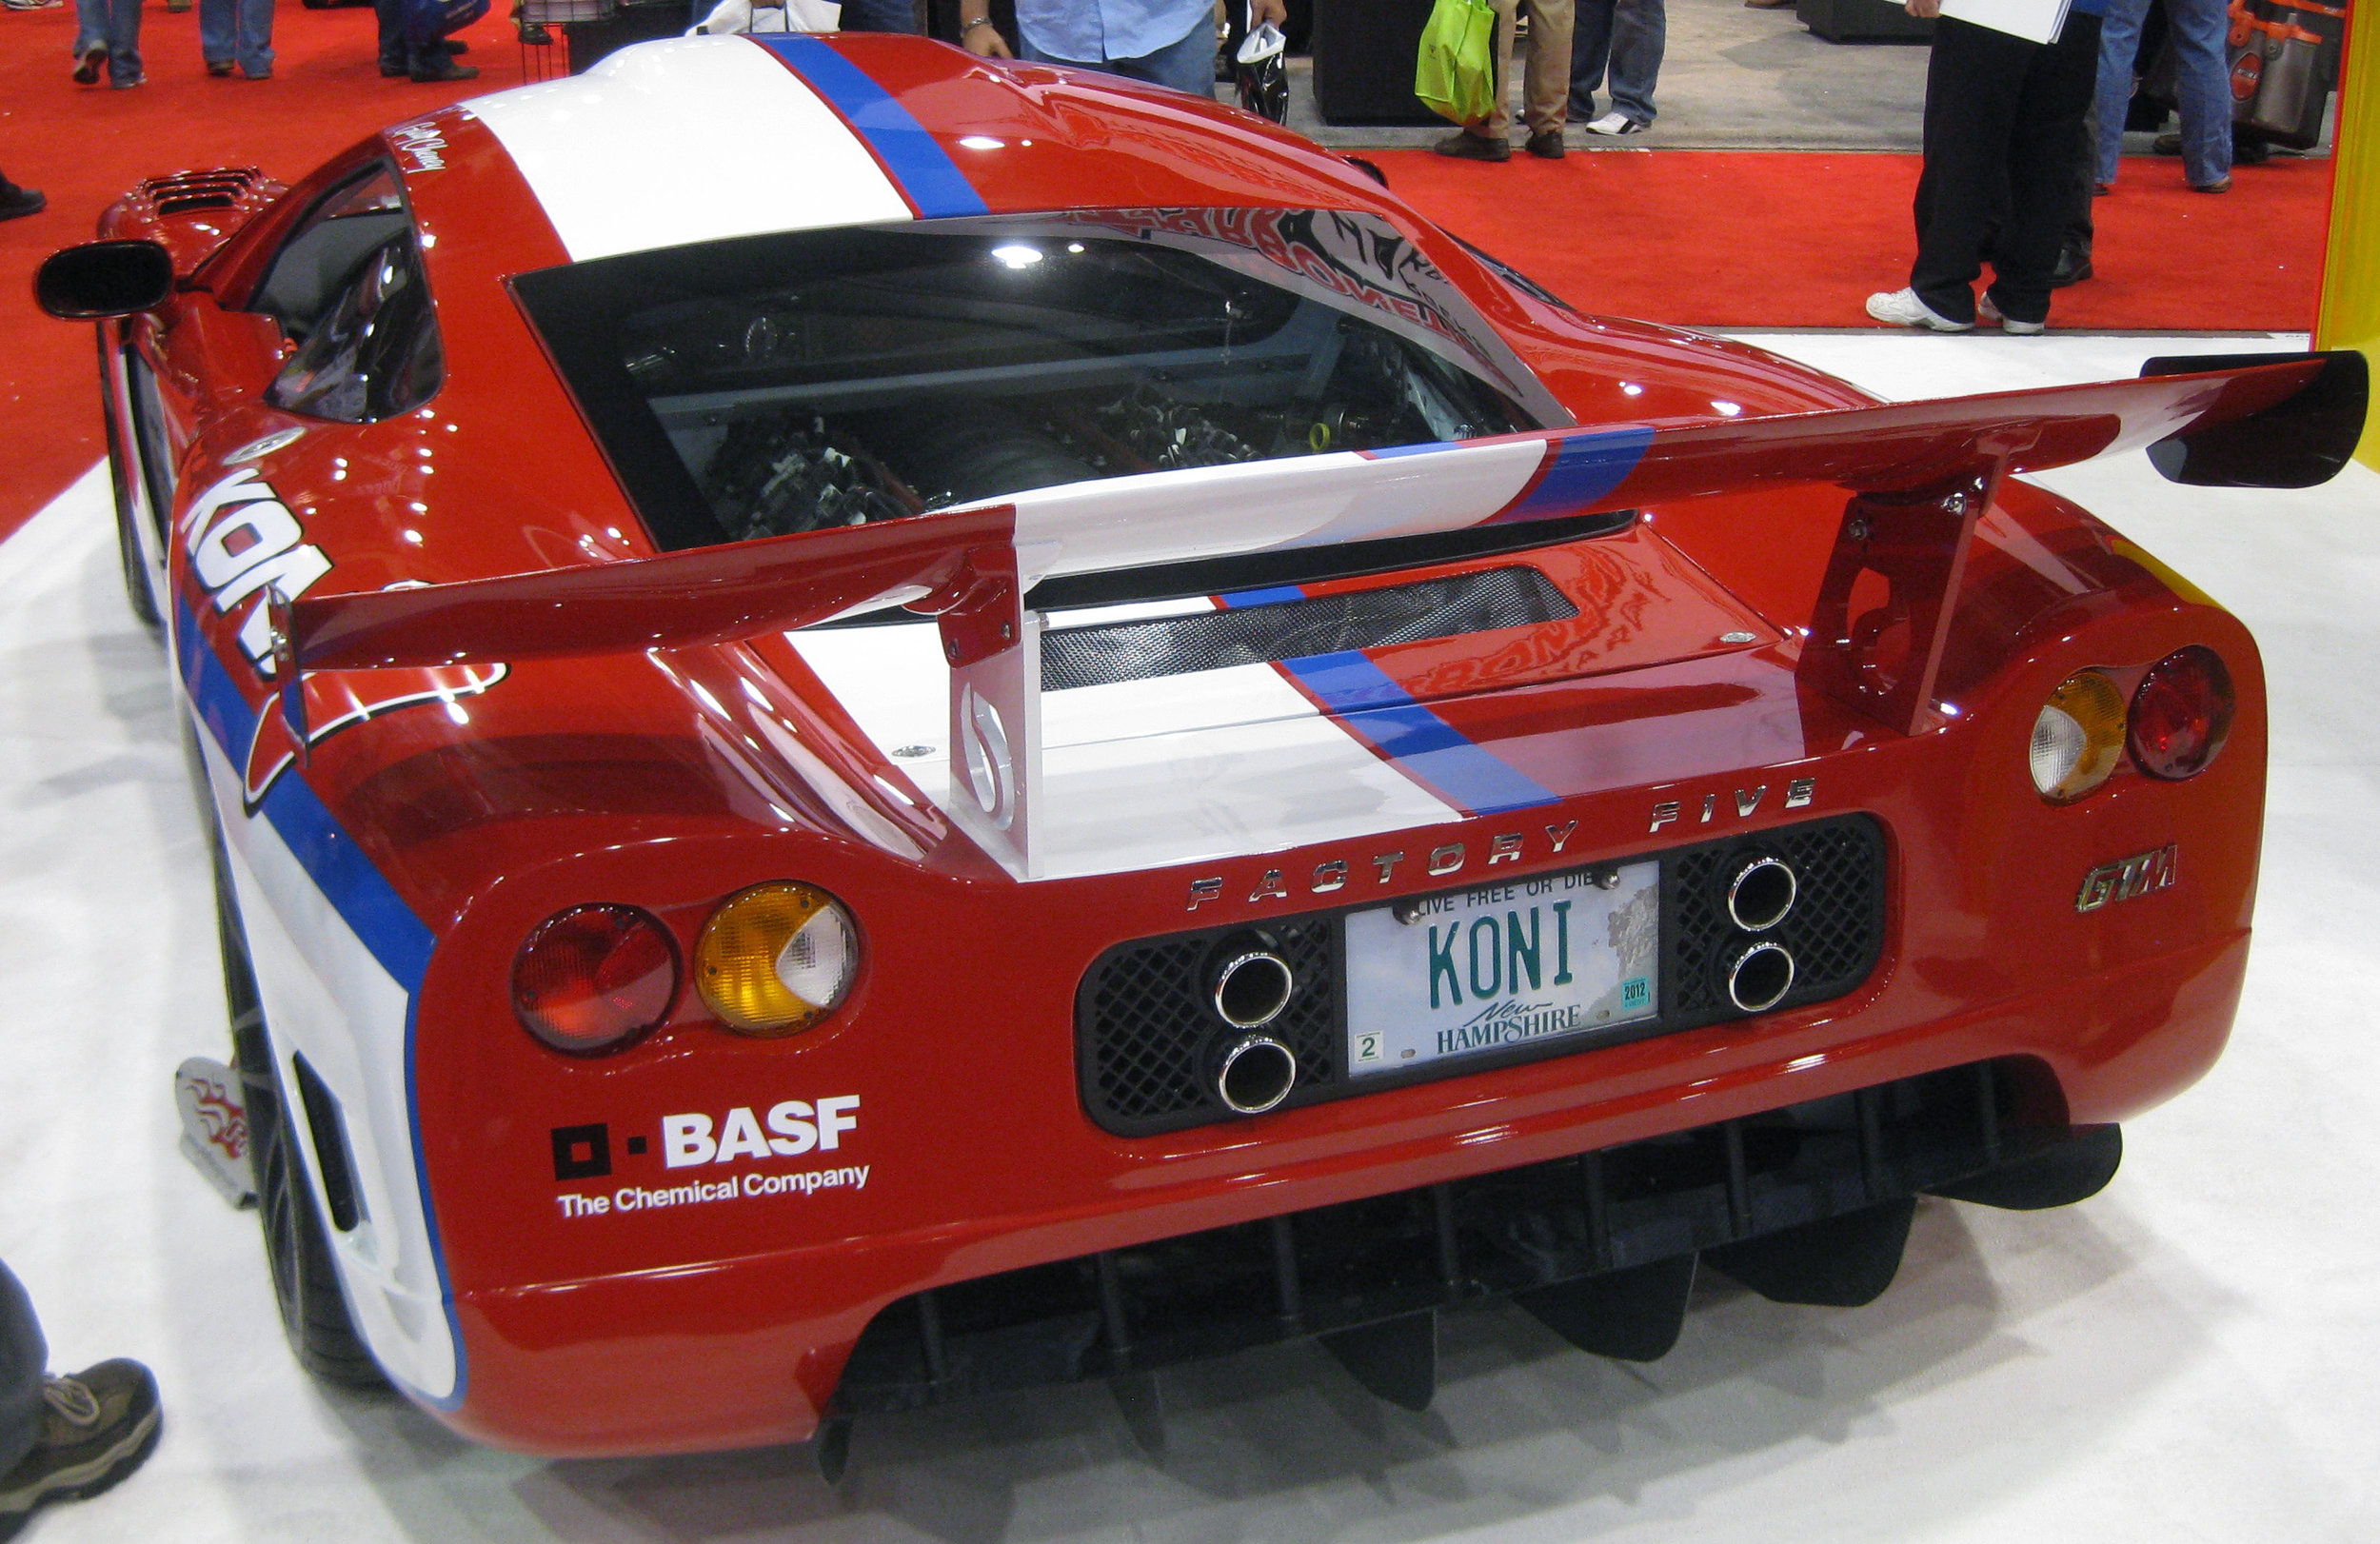
That’s why all modern sports cars and even many pedestrian fuel-economy-focused cars like the Prius have a high rear bumpers and smooth underbodies, among other things. Take a look at even the common Toyota Camry or Honda Civic and you can spot such changes over their much older models. The styling of 1990s and older cars tend to have low rear bumpers with low rear skirts. While this might have looked great at the time, that look definitely does not lend itself well to fuel economy or high-speed driving.

2017-07-26 009.JPG

Inspired by a common modification in the Civic and Miata worlds and from various modified cars on Minkara (a Japanese car site), I decided to modify my Alto Works rear bumper in the same manner as I modified my Roadster. By cutting out the lower portion of the rear plastic bumper, it can help eliminate potential drag, allowing air to escape smoothly. This is probably an effect that will only be beneficial at high speeds, but I think it also makes the rear look a lot more aggressive, since it shows some of the rear underpinnings of the car.

DSC_5680.JPG
IMG_2461.JPG

Granted, having a rear diffuser also would greatly improve aerodynamics. A well-designed diffuser would allow pressure from under the car to escape smoothly and draw air away, creating a vacuum effect. A diffuser works best when they are at least a certain size, angle, and distance away from the rear, not to mention in conjunction with a flat underbody. Unfortunately, the Alto was not designed in such a manner and this all can be impractical for a street car. Road debris, bumps and dips, and parking blocks are all enemies to a diffuser that juts out the rear.

2018-04-22 010.JPG

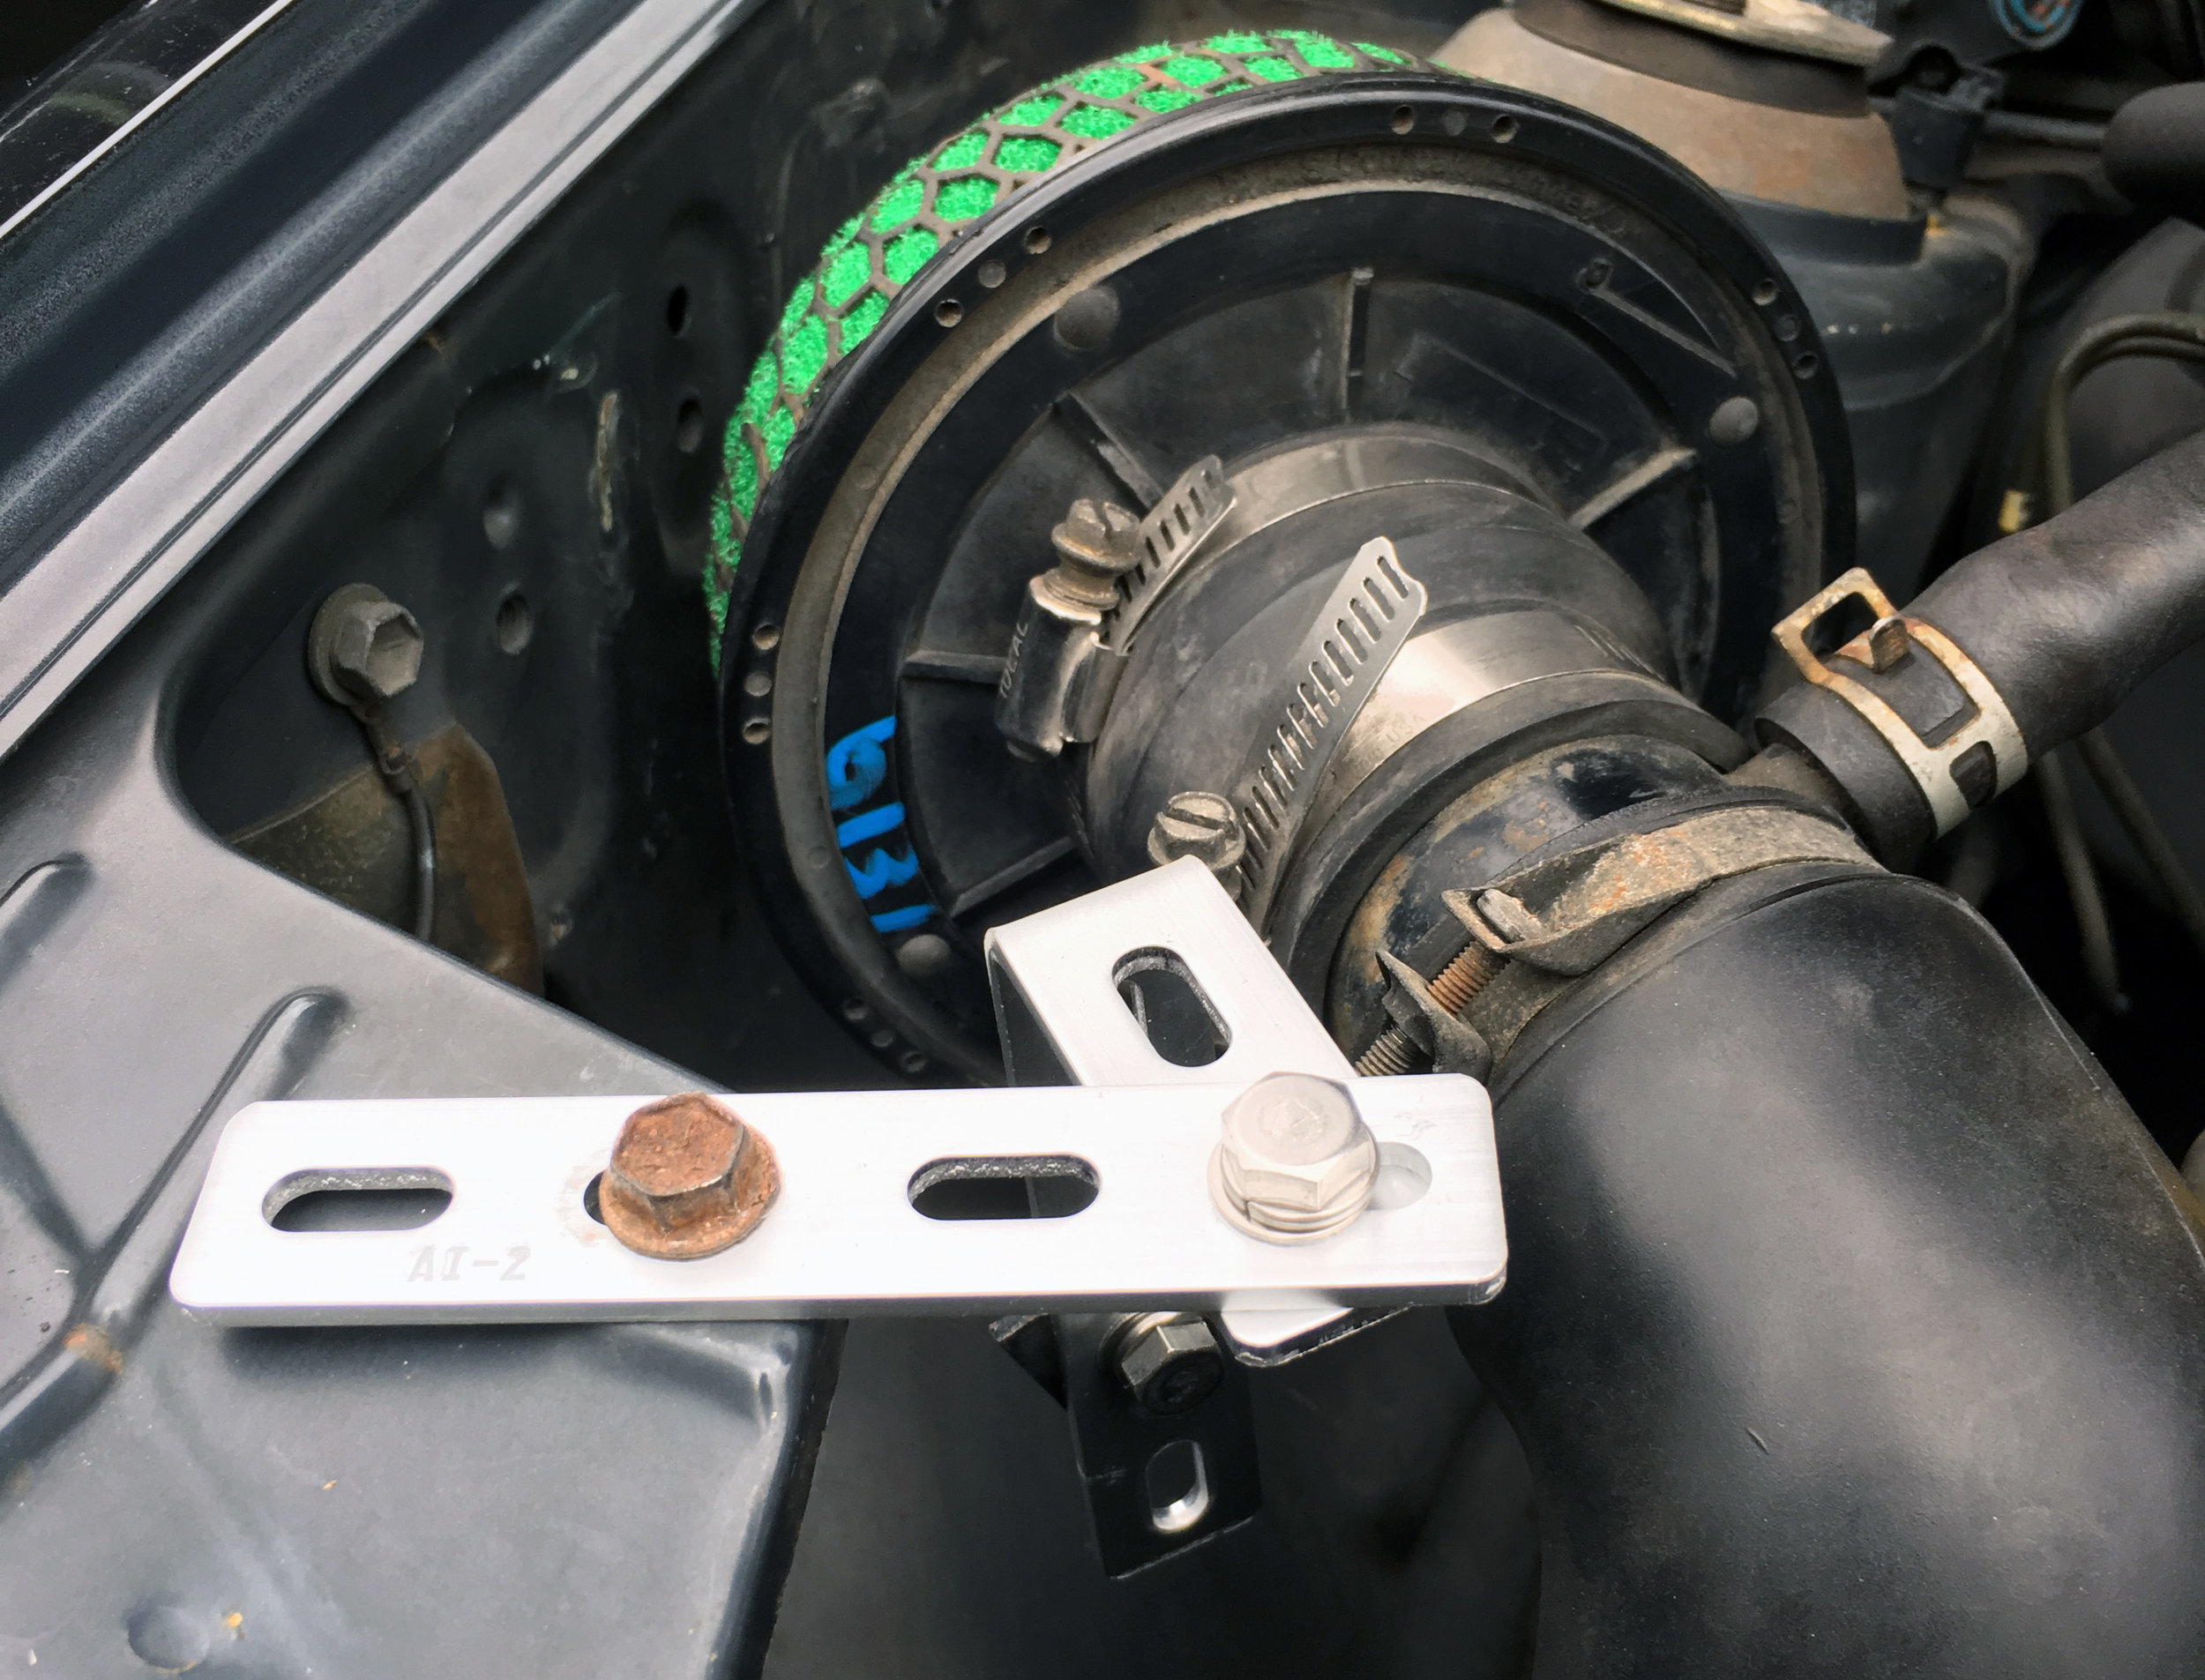
Removing the rear bumper on this car is an easy task, but it actually has quite a few screws, with three 10mm bolts, two license plate screws, two side screws, and two lower screws holding it on. Both of the lower bumper screws connecting it to this bracket promptly broke off, despite a little break-free spray. I’ll have to fix this later. From here, it is a matter of simply measuring about a thousand times and cutting once.

2018-04-22 012.JPG

The cutting wheel cut smoothly into the bumper even easier than it had for the front bumper. I just had to make sure to use a steady hand across the long line. Cutting burrs can be fixed later with a razor and files, but a wrong angle would be painful to correct, especially considering the length of the line across the rear.

2018-04-22 015.JPG

After a bit of minor filing, I think it came out well, if I say so myself. The line is fairly clean. I just need to touch up with black a bit and it will be finished.

2018-04-22 034.JPG

As much as I want a lower diffuser, it will have to come much later. It will definitely be in the Works.

July 02, 2018 /William Tjipto
JAPAN, JDM, SUZUKI, ALTO, ALTO WORKS, HA11S, CAR, KEI CAR, CAR LIFE, F6A, RHD, スズキ, アルト, アルトワークス, 自動車, 軽自動車, 日本, 車
Cars, Japan, Ownership, Project Sachiel
Comment
2018-04-27 017.JPG

[ Alto Works ] Front Bumper Modification, Part 1

June 25, 2018 by William Tjipto in Cars, Japan, Ownership, Project Sachiel

One thing that bothers me thus far is that I cannot identify the model or the packages of the car. According to the official paperwork, the car was made in 1998 or Heisei 10th year. For that year of production, the Alto Works Limited was only offered in Superior White. But this car has all the signs of the Limited model: 14” wheels, steering wheel, seats, and upper rear spoiler. Listed on the VIN plate is code 0DG, the body color of this car is definitely Saturn Black Metallic from the factory. Yet, all the catalogs I could find all suggest that there was no black produced. Anyone out there have an idea?

2018-04-14 042.JPG

I also can’t figure out why the front grill and intercooler intake are silver, while the logo is in red. No amount of internet scouring could explain it, since I don’t see it appear on any other cars in exactly this manner. It looks pretty professionally painted. Was it a factory option? Either way, I don’t like the contrasting color, so this has to be alleviated. Off it goes for a respray...

2018-04-20 016.JPG

This bumper is mounted with more points than I expected from a kei car. Wagon Rs literally have 3 screws and 5 plastic clips and it can come off. This one has 9 screws and a handful of clips… not to say this is very difficult, either.

I’m looking to also install a tow hook or strap. Unfortunately, kei cars don’t typically have the front crash beam tapped for a threaded hook. I’ll have to come up with some option to hard mount a hook somewhere.

What can we gleam from looking at the front of the naked front? The A/C radiator is absolutely gigantic compared to the actual engine radiator, which is on the left side of the car. (Right side when looking at it directly from the front.) The bottom of the radiator is designed with a ramp to divert a bit more air to it. There is some open area to the left in this photo below the A/C, perhaps that will be a good place for an oil cooler in the future. The front wheel well guards are molded into a part of the frame, so holes will have to be made into this surface for brake air ducts.

2018-04-20 017.JPG

Now that we have it off, our first modifications can begin. I saw a few interesting modified Alto bumpers on the internet and I wanted to do the same. Essentially, the objective is to increase airflow to the radiator of the car, which is on the left side of the car. (Right side when looking at it directly from the front.) The front bumper is already pretty busy and opened up for airflow. The turn signal and fog lights also take up a good portion of it as well. The only openings are in the black plastic in between the two grills.

Follow the old adage of “measure twice and cut once.” I made some templates and carefully attached it to the bumper with double-sided tape. Instead of using heavier cutting tools, I opted for a delicate dremel to cut cleaner lines. The ABS material (with very few fibers for reinforcement) is relatively soft, so it is cut fairly easily and smoothly.

2018-04-20 029.JPG

It took a bit of time to do properly. I passed the cutting wheel gently over each line several passes, being careful with the corners. The proper way to use a dremel is to cut lightly, as the motor is more about speed than torque. Applying significant force might get things done, but it will burn the brushes out quickly.

To finish up the cutting, a good old box cutter is strong enough to cut through the material. In reality, I didn’t need to put so much effort into doing this properly, as this car is far from being a show queen. But if you’re gonna do it, do it right.

2018-04-20 020.JPG

I think it came out really well. It is subtle enough to not be distracting, but it is a cool addition for those taking notice of such little things. It is also extremely functional, but how much additional cooling it adds is questionable. But it certainly won’t hurt.

2018-04-20 024b.jpg

Time to paint and find some mesh!

June 25, 2018 /William Tjipto
JAPAN, JDM, SUZUKI, ALTO, ALTO WORKS, HA11S, CAR, KEI CAR, CAR LIFE, F6A, RHD, スズキ, アルト, アルトワークス, 自動車, 軽自動車, 日本, 車
Cars, Japan, Ownership, Project Sachiel
Comment
2018-04-14 012.JPG

[ Alto Works ] Cheap (Bucket) Seats

June 18, 2018 by William Tjipto in Cars, Japan, Ownership, Project Sachiel

I don’t mean to complain about the stock front Alto Works Limited sport seats seats, as they are actually quite good for an economy car. They have good bolstering along the thigh and lower back, so they feel somewhat supportive during spirited driving. I am generally pretty impressed with the comfort and, of course, they are still easy to get in and out of. However, I feel I sit at a rather high position for such a low car. So, with many things, they can be improved.

DSC_4520.JPG

I picked up a virtually free trick from the Miata.net forums to get a lower seating position and increase side bolstering on the stock seats. All that is involved is some zip ties, some cutting tools, and a few hours of free time to cut out the foam in the seat. The Miata guys call it a “foamectomy.” The Miata Roadster seats actually have a relatively thick pad of about 4 inches so it is quite logical to cut some out in order to get a better seating position.

I actually did this on my own NA8 some years back before I picked up a Lotus Exige-style bucket. I am about 6 feet tall (182 cm), so it was necessary to get low enough to avoid hitting the roof of the car. Since it was so successful, I thought it would do wonders for my Alto Works.

The only drawback is that it is a permanent modification to the seats and does potentially ruin the comfort of the stock seats, but I figured if I mess up, I could always just buy another replacement stock seat or go full bucket. I have not much to lose.

2018-04-22 019.JPG

Remove four 12mm bolts on the rails and one hidden under the center console, disconnect the seat belt sensor connector, and the seat is removed easily. I used this chance and cleaned up the carpeting.

2018-04-22 018.JPG

Looking at the brackets, the seats were made decently low from the factory, as the seat sliders are bolted directly to the bottom seat pan, offering little space for further welding modification short of discarding the sliders and bolting the seat straight to the floor. As a two-door car, that’s an unreasonable change at this time, since accessing the rear seats from time to time would be a necessity. (Not to mention slightly worrisome, as my amateur welding ability could prove dangerous in an accident.)

To undo the upholstery, there are several metal rings that need to be bent and removed…Well, crap. The foam on the seats is surprisingly thin as it is, around an inch (3 cm) thick. I was considering giving up, but Matsuda-san suggested I simply re-adjust the springs. Not a bad idea! By leaving the front spring at a high perch and progressively lowering the rearward springs, it creates an decline where my rear end sits more deeply into the seat.

2018-04-22 023.JPG

Relocating the springs to near the bottom of the panel gave me around 25 - 30 mm of lowering, which is quite a lot considering it is still on sliders. After multiple test sittings, I found that it felt more comfortable than the stock seat. My ample rear end could not feel the metal plate, zip ties, or springs.

2018-04-22 026.JPG

Reassembly is a matter of just reversing the whole process, but instead of the metal rings clipping the upholstery to the frame, I just used zip ties to put the cloth all tightly together Saves time and works just as well, minimally affecting the looseness of the fabric, if at all. So how did it turn out?

2018-04-22 027.JPG

I think it came out really well. The seat feels noticeably lower, especially when compared against the non-modified passenger seat. As a result of only the rear of the seat being lowered, it feels as if the bolsters are “cradling” me more, creating the illusion of added side bolsters without the need to replace the seat with something less livable day-to-day. A full bucket will come, but at a much later time. Right now I’m sitting pretty happy.

If you’re a bit handy, you can give your own seats a shot. I’m sure many stock seats can be modified in some similar way, as long as you don’t mind making potentially permanent modifications.

June 18, 2018 /William Tjipto
JAPAN, JDM, SUZUKI, ALTO, ALTO WORKS, HA11S, CAR, KEI CAR, CAR LIFE, F6A, RHD, スズキ, アルト, アルトワークス, 自動車, 軽自動車, 日本, 車, foamectomy
Cars, Japan, Ownership, Project Sachiel
Comment
2018-04-20 015.JPG

[ Alto Works ] D-1 Spec Oil Catch Can Modification

June 14, 2018 by William Tjipto in Cars, Japan, Ownership, Project Sachiel

High-mileage turbo’d cars are dirty. Piston rings are old and worn, so they might have quite a bit of blow-by, which means compression losses and lower power. But it also means oil in the air is recirculated back from the engine by the dump valve into the intake. In a naturally-aspirated engine, it’s usually not a problem as it is burned off fairly cleanly, though in a turbo engine, it can build up throughout the intercooler, piping, and intake manifold, severely affecting performance. Sadly, my high-mileage Alto probably has a bit of it already, judging by the inside of some of the piping. Until I need to replace these, I installed a oil catch can in the meantime to help prevent further buildup.

2018-04-18 003.JPG

I picked up this new D-1 Spec oil catch can for a mere 2400¥ ($22 USD), so I didn’t expect much. Construction seems pretty solid and there are no burrs or any strange issues with molding that I could see. It’s definitely a lot larger than I expected; I’d have been happy with half the size. Sadly, for the price, there is no internal baffling unlike higher end products. I had to make do with some large wire, stainless steel scrubbers. Hopefully it doesn’t fall apart and end up in my intake.

2018-04-22 047.JPG

This oil catch can is a cheap product, so I expected cheap performance, for sure. I installed it in the only empty space in the crowded engine bay, near the brake booster, the right strut, and intake. Luckily, that’s where it needs to be, anyway. It’s hard to see at the moment, but you can see how I used some aluminum brackets to make a mount for it.

2018-04-22 048.JPG

After a long weekend trip running the car, I found that there was a bit of oily grease along the walls of the can. Good to know its working to some degree so far, catching some of the excess oil from being recirculated back into the intake. This was definitely a worthwhile preventative modification.

June 14, 2018 /William Tjipto
JAPAN, JDM, SUZUKI, ALTO, ALTO WORKS, HA11S, CAR, KEI CAR, CAR LIFE, F6A, RHD, スズキ, アルト, アルトワークス, 自動車, 軽自動車, 日本, 車
Cars, Japan, Ownership, Project Sachiel
Comment
2018-04-15 005.JPG

[ Alto Works ] HKS Super Power Flow

June 05, 2018 by William Tjipto in Cars, Japan, Ownership, Project Sachiel
IMG_0425.JPG

Turbo cars can benefit greatly with a well-designed aftermarket air intake, as the stock intake can be, on some cars, a bit restrictive and can limit the additional amount of air necessary for high boost pressures. A higher flow filter, directed to draw air from cooler areas of the engine bay or directly from the front, can help improve power at higher RPMs.

2017-10-07 004.JPG

However, there can be several drawbacks with aftermarket intakes, even the best designed ones. Noise is increased, unshielded filters can draw in hot air near the exhaust manifold, and exposed filters can draw in more debris or potentially water. Also importantly, engine tuning can be negatively affected, as the proper balance of air, fuel, and timing is absolutely critical.

Simply dropping in a cone filter does not necessarily improve performance. Many unknowing car owners pull out the stock intake piping, drop in a cone filter, and call it “good.” Stock intakes are designed a certain way for a reason; sometimes extra piping and large, empty Helmholtz chambers are needed and the location of air snorkels are well engineered. Moreover, the Mass Air Flow sensor is placed a certain distance away from the intake throttle body to properly measure air, but sadly, I’ve seen under enough hoods to realize not everyone knows this.

IMG_3281.JPG

In California and some states in America, the replacement intake must also be certified CARB legal, so options are limited. In Japan, virtually any reasonable intake can be installed and still pass Japanese inspection. Knowing the potential drawbacks of installing an aftermarket intake, I figure the potential benefits still outweigh them and so all my cars have aftermarket intakes installed at the moment, all from highly reputable manufacturers.

2018-04-14 027.JPG

Upon inspecting the original intake and filter, I found that it seems actually quite well designed as it is. The intake is piped in from just behind the right headlight, potentially drawing in plenty of fresh air, though sadly the intake piping is slightly small in diameter and has too many sharp bends, potentially decreasing airflow speed and pressure.

2018-04-14 032.JPG

The filter design itself seems actually quite good, as the pleated filter offers plenty of surface area to draw air in. I contemplated keeping the original air box and simply altering the intake snorkel to improve airflow. Thankfully the previous owner of this Alto was gracious enough to include an uninstalled HKS Super Power Flow as part of the package, so I neither needed to buy an aftermarket part, nor modify my existing intake.

2018-04-10 005.JPG

HKS filters have been criticized in some circles for being ineffectual or even poorly designed, as they say it can allow too much air particulates to enter the intake. Some famous Japanese tuners swear by them, though, and I’ve talked to a few owners who have put many miles (or should I say, kilometers) with the intakes and claim they work well.

Well, why not drop it in and see how it goes?

2018-04-15 007.JPG

The mounts it came with were OEM and did not appear to be the mounts HKS originally included, according to their manual, so I had to use some aluminum brackets for a proper fit to avoid hitting the hood or other components in the engine bay.

2018-04-15 006.JPG

While there is likely not a huge benefit for a stock-tuned engine, it might open up an ounce of HP if the engine can breathe more. The replacement HKS Super Power Flow intake sound is lovely, the sound of rushing air clearly audible in the cabin, even with windows up. These sounds, combined with the woosh of the recirculating valve, make the car sound lively around 3000 - 6000 RPM.

2018-04-15 009.JPG

Along with this installation, I used a super thin .3mm aluminum sheet bent and shaped to block off extra radiant heat from the engine, hopefully encouraging cooler air to be drawn in from around the right headlight. (Although it looks like cardboard from some angles, the brown is actually just an adhesive backing sheet I opted not to remove at this time.)

2018-04-15 010.JPG

This heat shield modification is only temporary until I redesign it with a thicker and larger aluminum sheet, which is already in progress. I would also like to use the dummy right inlet to the side of the headlight to potentially force more air directly into the air filter. Let’s see how that goes in the future...

June 05, 2018 /William Tjipto
Japan, JDM, Suzuki, Alto, Alto Works, HA11S, car, kei car, Car Life, F6A, RHD, HKS, スズキ, アルト, アルトワークス, 自動車, 軽自動車, 日本, 車, Mitsubishi, 4B11T, 三菱, Mazda, マツダ, M16A, AEM, Racing Beat
Cars, Japan, Ownership, Project Sachiel
Comment
  • Newer
  • Older

Powered by Squarespace